 |
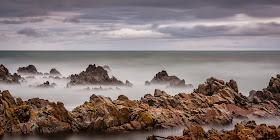
| Another World - Canon 40D, Canon 17-55, 60s, f/9.5, ISO100, ND filter |
I have just returned from a week at the sea with family, and for the first time in quite a while I have been able to spend some serious time photographing (see my
previous post for the reason). It turns out that most of my keepers where made with a strong ND filter on my lens.
Passing the time
A while back I bought a stack of three ND filters: 3 stops, 6 stops and 10 stops. Only now have I gotten around to trying them out for real. These are basically just dark pieces of glass which block most of the light, allowing for longer shutter speeds during the day time.
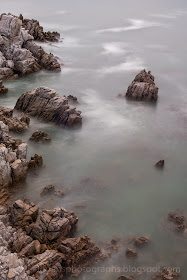 |
| Rock in the Tide - Canon 40D, Canon 17-55, 90s, f/16, ISO 100, ND filter |
Moving water gets smoothed out over time, with very different effects achieved at different time scales. These first three pictures basically use the long exposure to turn the churning water into a sea of fog, from which the rocks emerge. Naturally, a sturdy tripod is a must.
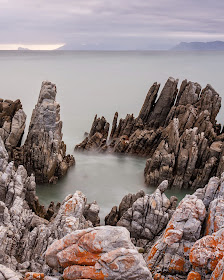 |
| Magic Pool - Canon 40D, Canon 17-55, 45s, f/8, ISO 100, ND filter |
Those who know the South African coast may recognise Hangklip just over the horizon in the above shot - it was taken from De Kelders, next to Gaansbaai.
Panning for gold
Another game one can play with long shutter speeds is panning. One usually sees this in photographs of racing cars, where the camera swings to keep the car centered while the background is blurred by the motion, conveying a sense of speed.
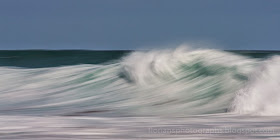 |
| The Wave - Canon 40D, Canon 70-200, 1/6, f/11, ISO 100, ND filter |
Here I tried this trick at the beach, panning to follow a wave. As you can see, the shutter speed is much faster (I used the 3 stop ND filter), but the 200mm focal length means that you still get enough blur to make the image more abstract.
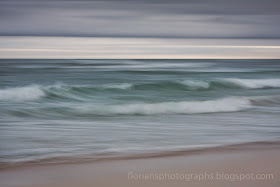 |
| Beach Tranquility 1 - Canon 40D, Canon 17-55, 1s, f/5.6, ISO 100, ND filter |
This is probably my favourite image of the lot. The camera movement smooths out rough details, making the image more restful. One challenge is getting a reasonably sharp horizon: for this your tripod head needs to be absolutely horizontal, so that the horizon does not move up or down during panning. I find that the bubble level on my tripod head is not accurate enough for this, so I did the following. I use live view and tilt the camera so that the horizon is just below one of the framing lines (if you need to conserve your battery, or don't want to heat up the sensor, you can use the little autofocus rectangles in your viewfinder instead). Then I pan back and forth, and look for the direction in which the horizon appears the highest (i.e. the camera is pointing lowest). Now I fiddle with the tripod legs (or a leveler, which I borrowed from my panoramic head for this purpose) to raise the camera slightly in this direction and try again. Eventually the horizon stays put when I swivel the camera, and I'm ready to go. But first: don't forget to focus at infinity - I did!
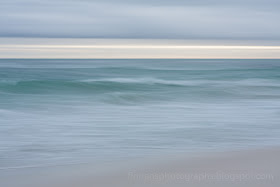 |
| Beach Tranquility 2 - Canon 40D, Canon 17-55, 1s, f/5.6, ISO 100, ND filter |
Other images
While we're on the topic of attaching funny filters...
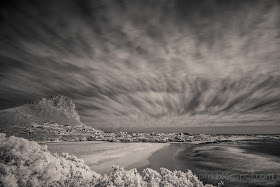 |
| Rooi Els - Canon 40D, Tokina 11-16, 10s, f/4, ISO 1000, IR filter |
...here's a shot of Rooi Els (with Hangklip on the left) taken in the infrared. This time the long exposure time is due to the infrared blocking filter in front of the sensor. I wrote more about infrared photography in an
older blog post. The image is strange rather than beautiful, but the sky was something special, so here's another shot, this time without anything more fancy than a polariser on the lens.
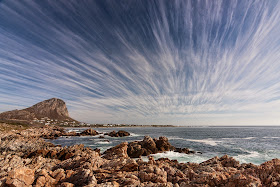 |
| Radiant Sky - Canon 40D, Tokina 11-16, 1/125. f/8, ISO 100, polariser |
The cloud streamers in the sky are actually parallel, and the radiating effect comes from the perspective, which is exaggerated by the wide angle lens (11mm). In fact, this sky is simply begging for a panorama. Did I make one?
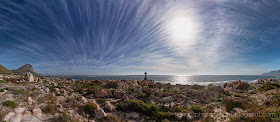 |
| Panorama Attempt 1 - Canon 40D, Tokina 11-16, 6x(1/125+1/500+1/2000), f/8, ISO 100 |
Of course I did! But I made a huge mistake: I was too lazy to dig out my panorama adapter from under the luggage in my car, so I shot this hand-held. As a result I have spent many hours in front of my computer trying to stitch this properly. The above attempt was made in Photoshop, after I couldn't get a decent result from Hugin. I had to use Puppet Transform to get the horizon straight, and I couldn't properly merge the different exposures. I'll try again some other time.
Here is a parting shot:
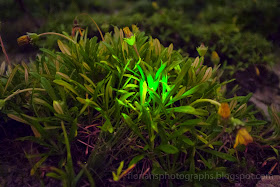 |
| Glow From Within - Fuji x100s, 30s, f/2, ISO 6400 |
Why is the exposure so long? Because this is illuminated mostly by starlight... and by the glow worm sitting among the leaves! Again, not a masterful image, but the scene was quite cute. It is also the first time I managed to photograph a glow worm, well, at least its glow. The worm itself is, of course, overexposed.
Have a good one!


No comments:
Post a Comment